Saturday, February 25, 2012

Drawing the Keel and Ribs - Part 2 - Drawing the Ribs

In the last post I took a drawing of the ship and brought it into MS Paint. Then I adjusted the scale of the two key views so that the scales were identical.

In this video I work with the cross sectional view to make an outline of the first rib. The first rib can be made with this outline.

The model has twenty ribs and each are made in a similar way to the first rib. I will post the remaining rib patterns in another blog.


Monday, February 20, 2012

Drawing the Keel and Ribs - Part 1

This video takes the Lighthouse Board's drawing of the ship(s) and corrects the dimensional differences between the cross sectional view (stations) and the profile or keel section view. They were drawn to different scales and need to be made the same.

The image of the historical drawing is taken into MS Paint and resized.

Saturday, February 18, 2012

Making a Plan

Every plan starts with an idea and my idea for the next ship is a lightship.

Lightships are ships placed at the entrance to harbours to guide ships in and out of the harbour. They frequently are not named but have the name of the harbour written on the side of the ship - very practical - with lights to guide ships in and out of the harbour.

I found the following public domain images on the Historic Naval Ships Association web site. The images will be used to make a drawing for a model boat. Bookmark the HNSA website for the future because many ships are illustrated there.

This is US Lightship #83 in profile.
This image tells me the shape of the keel.


The location of features along the keel.
This gives an idea of the cross sectional shape and where the main elements are located on the keel. Accurate cross-sections are very helpful - see the next image.


The contour lines of the ship.
The sectional lines give the shape of the hull. This information is used to make the pattern for the hull.


Detail of the lights.
This detail helps find the dimensions and details for the masts and lights. Photographs will help here too.


The superstructure.
This is the superstructure, and also a bird's eye view to help locate the masts properly!


Next... making drawings of the keel and station sections.

Monday, February 13, 2012

Making a Model Boat

This is a how-to blog for people wanting to make and sail a model boat. 

This idea was inspired by my grandfather who made a small naval cannon for me when I was four or five. Although at the time I would have preferred a GI-Joe... his gift made me feel a little special.


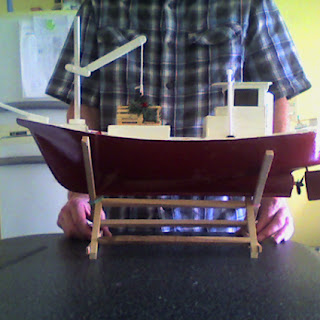
This is the first model boat I made. It is a model of a lobster fishing boat I saw on a holiday to Prince Edward Island a few months before my daughter was born.

The model is built of popsicle sticks and barbecue skewers and other bits and pieces of recycled material. The windows are plastic from a box of chocolates. The wood is glued together with Elmer's white glue, patched with expoxy body filler, and waterproofed with varnish. I don't know, it's probably toxic as hell but my goal was to use recycled materials.


An alternative to epoxy and super glue would be nice - perhaps carpenter's glue - but epoxy makes a very waterproof hull and provides strength. The epoxy can get be purchased at the supermarket. All the construction materials can be purchased at the supermarket or hardware store.

The radio control gear is the best part. Thanks to China's export-oriented growth strategy and willingness to sell Yuan at a discount, you are able to buy a fully proportional two or three channel radio transmitter and receiver for around US$20 not including shipping.

The electric motor cost about $25. The speed controller was the most expensive part at $35. The driveshaft and propeller cost less than $10.

The batteries are 4 D cell carbon batteries because I did not want to burden the owner with having to manage exotic batteries. These batteries push the boat along at a very realistic pace.

In terms of know-how, making a model boat doesn't require a lot of skill. You should be able to chop carrots in the kitchen without getting your fingers in the way. I've done this as a class project with teenage students who have not used a utility knife before. If you can chop onions successfully you can build a boat with a little practice and patience.